Jump to content

Search the Community

Showing results for tags 'ableton live'.

  • Search By Tags

    Type tags separated by commas.
  • Search By Author

Content Type


Forums

  • General Forums
    • Welcome New Members !
    • General Discussion
    • CTW News, Comments & Suggestions
  • Clubbing Forums
    • UK Clubbing Forum
    • Ibiza Clubbing Forum
    • Other Regions Clubbing Forum
  • Music Forums
    • Mixes, Tunes & Genres Forum
    • DJ Forum
    • Music Production Forum

Calendars

  • UK Clubbing Calendar
  • Ibiza Clubbing Calendar
  • Other Regions Calendar

Categories

  • Bedfordshire
  • Brighton
  • Birmingham
  • Bournemouth
  • Devon
  • Ibiza
  • Leeds
  • Leicestershire
  • Liverpool
  • London
  • Manchester
  • Sheffield

Blogs

  • James' Music Production Blog
  • Clubbing Si’s Blog
  • James’ CTW Blog
  • Dani Babyboo's Blog

Find results in...

Find results that contain...


Date Created

  • Start

    End


Last Updated

  • Start

    End


Filter by number of...

Joined

  • Start

    End


Group


Title


Name


Location


Occupation


Hobbies & Interests


Favourite Bars


Biography


Favourite Sayings & Quotes


Homepage


LinkedIn


Skype


MSN


Favourite Music Genres


Favourite Music Genres (other)


Favourite Clubs & Events


Favourite DJs & Producers


Favourite DAWs


Soundcloud


Mixcloud


Spotify


YouTube


How did you discover ClubTheWorld ?


Why did you join ClubTheWorld ?


Would you be interested in helping out on ClubTheWorld ?


ubb_homepage


ubb_occupation


ubb_hobbies


ubb_location


ubb_msn

Found 11 results

  1. Ableton Live 12.1 is now in public beta. This free update for Ableton’s music performance and production software comes with significant additions and improvements to all editions of Live, including Live Lite, plus Push.… Read More Ableton Live 12.1 Now In Public BetaView the full article
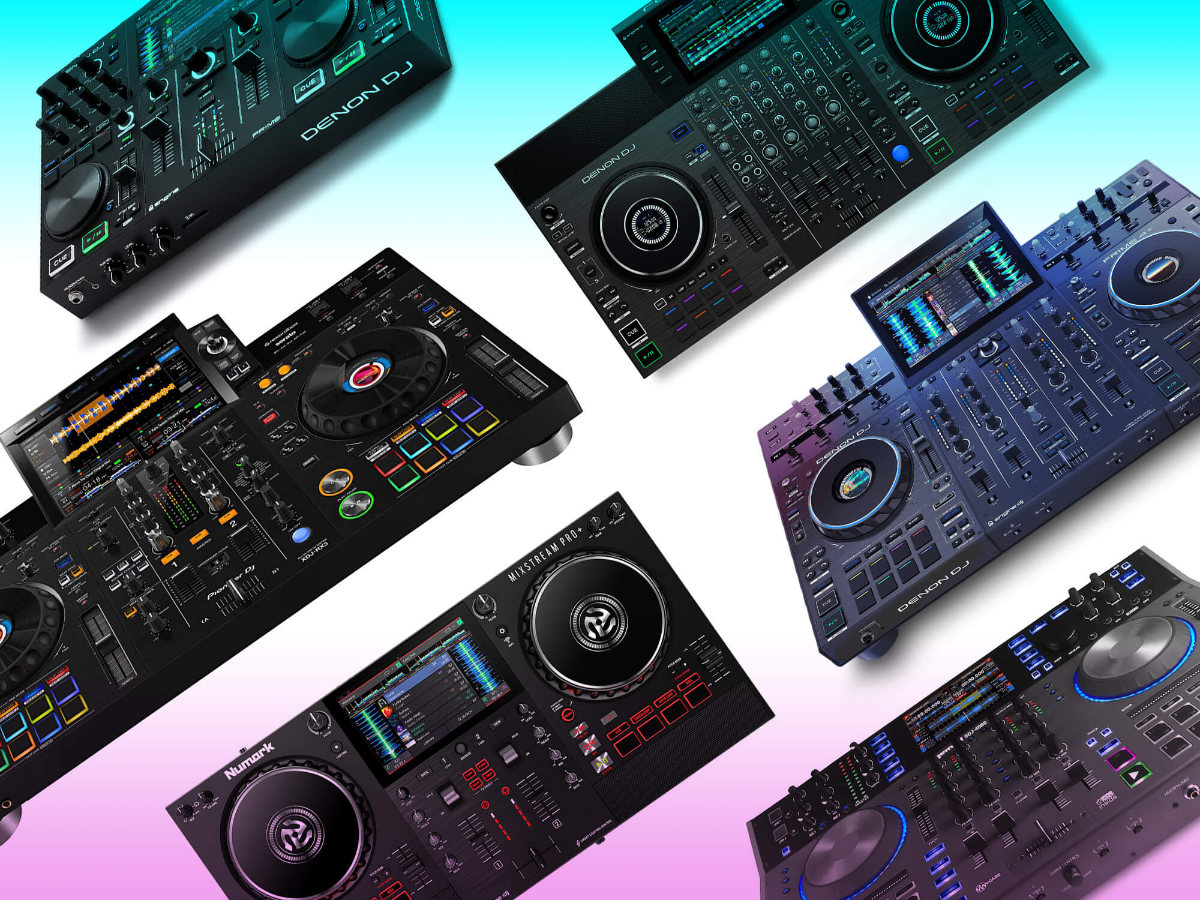
  2. Here is a list of useful links for the best DJ gear, controllers & software 2024 Best DJ controllers 2024: Hands-on control for Serato, rekordbox, Traktor and more - our expert picks Best DJ Gear 2024: 11 best DJ software for mixing and playlisting in 2024 Best DJ plugins of 2024: Free software and apps for DJing Best DJ Software - Top 5 Choices for Digital DJing 2024 Best Pioneer DJ Gear 2024 The best DJ controllers in 2024 The Ultimate Guide to the Best DJ Setups in 2024 for any Budget! 2023 Best DJ Gear 2023: 9 of the best DJ Controllers under $400 Best DJ Gear 2023: 8 of the best Standalone DJ Controllers in 2023 The 10 best DJ software available in 2023 Please reply to this topic if you find any other useful links, we'll keep this list updated
  3. Abletunes released Analog Drums, a free virtual drum rack for Ableton Live. Analog Drums is an Ableton Live native release compatible with all editions of Ableton Live 11 or newer, including Intro, Standard and Suite. Abletunes states, “Analog Drums sets a new standard for drum racks, delivering a complete analog-style drum machine experience right inside [...] View post: Abletunes Analog Drums is a FREE Virtual Drum Rack for Ableton Live View the full article
  4. About Ableton has officially released Live 12, the latest update to its popular DAW https://www.ableton.com/en/live/ Whats New UI Improvements Improved layout Filter based on tags in Live’s Browser Improved Workflow New Devices Meld (Synth) Granulator III (Sampler) Roar (Saturation Effect) New MIDI Tools Reshape MIDI patterns Generate new ideas Join, split & chop notes Stay in key across devices Additional Features Uncover new textures Performance Pack Lost and Found Pricing Live 12 Intro - £69 Essentials – 16 tracks and 5+ GB of sounds Live 12 Standard - £259 Full features – 38+ GB of sounds and more instruments and effects Live 12 Suite - £539 Complete studio – 71+ GB of sounds, Max for Live and all instruments and effects YouTube
  5. Ableton has officially released Live 12, the latest update to its popular DAW ...
  6. After teasing its release last fall, Ableton has released the new Ableton Live 12 software – available for purchase on the company’s website and downloadable via your Ableton account if you’ve pre-ordered the program. The company has also published a series of how-to videos, to get to know the program’s major feature updates and additions. It’s […] The post Ableton Live 12 is here: new Performance Packs, sounds, MIDI tools + a refreshed workflow and more appeared first on DJ TechTools. View the full article
  7. Ableton Live has consistently set the bar for what a digital audio workstation (DAW) can do, offering a blend of powerful music creation and performance features. With the release of Ableton Live 12, the excitement in the music production community is palpable – but is it really worth it? This latest version introduces a host of new features designed to enhance workflow, creativity, and performance. Here’s a look at the 12 most exciting features of Ableton Live 12 that are stirring the most buzz. Start your music production journey here: Download your FREE “New Producer Starter Pack” today. Ableton Live 12 Features and Review 1. Advanced MIDI Capabilities Live 12 takes audio-to-MIDI conversion to the next level, offering more accuracy and flexibility. Convert melodies, harmonies, and rhythms from audio samples into MIDI clips, allowing for endless creative possibilities. I haven’t experimented much with the audio to MIDI (as it wasn’t very accurate in Live 11), but the added MIDI features are great for adding a more human feel to programmed MIDI. Also, the global scale function is great! 2. Enhanced MPE Support MIDI Polyphonic Expression (MPE) support has been significantly improved, giving users more expressive control over individual notes within chords. This opens up a new dimension of expressiveness when using MPE-compatible hardware and software instruments. I personally don’t have an MPE device yet, but if you do – this is great. 3. Integrated Dolby Atmos Support Ableton Live 12 introduces native support for mixing in Dolby Atmos, enabling musicians and producers to create spatial audio mixes without needing external software. This feature is a game-changer for those looking to produce music for films, games, and VR. Looking forward to digging into this as Dolby becomes more widely used! 4. New and Improved Devices Live 12 introduces several new devices and updates to existing ones. There aren’t many, but Meld (synth) is nice, Granulator 3 is great, and Roar (the multi-band saturator) is awesome! I expect to be using that a LOT. 5. Comprehensive Clip Editing The clip view has been overhauled to offer more comprehensive editing features directly within the clip. This means less toggling between views and a smoother workflow for editing MIDI notes and audio clips. 6. Enhanced Max for Live Integration Max for Live is more deeply integrated into Live 12, offering even smoother performance and stability. This enhancement makes it easier to use custom devices and effects, enriching your creative palette. Again, looking forward to digging into this. 7. High-Resolution Interface Ableton Live 12 boasts a high-resolution interface, making it more accessible and enjoyable to use on large and high-DPI screens. This update ensures a crisp, clear visual experience, enhancing workflow and reducing eye strain. 8. Improved Browser Finding the right sounds and samples is faster than ever with an improved browser. Enhanced search capabilities and tagging make it simple to manage and locate your library’s vast resources. This will be amazing for me once I’ve tagged all my favourite samples. 9. Cloud Collaboration Live 12 introduces cloud-based project collaboration, making it easier to work with other musicians and producers remotely. Share projects, collaborate in real-time, and manage versions without leaving the DAW. 10. Advanced Tempo Following Ableton Live 12’s tempo following feature has been enhanced, allowing Live to automatically adjust its tempo based on incoming audio in real-time. This is particularly useful for live performances, ensuring seamless integration with live musicians. 11. Voice Isolation and Separation New tools for voice isolation and separation make it possible to extract vocals from complex audio tracks with remarkable precision. This feature is invaluable for remixing, sampling, and creating acapellas. 12. AI-Powered Sound Design Tools Ableton Live 12 introduces AI-powered sound design tools that analyze and suggest adjustments to your sounds. This feature can inspire new creative directions and help refine your sound to perfection. Ableton Live 12 Conclusion I’ve been using the Ableton Live 12 beta version for a few months now. There are a couple of teething issues with the browser workflow for me (not having the plugin folders makes it a bit clunky), but there is the tagging workaround (as shown in the video above). I know that once I get used to it, I’ll be working faster, and producing better music (especially using the “Roar” multi-band saturator that I love!) Honestly – I am excited to start using these extra features, but – if you know you don’t need them – I wouldn’t upgrade from 11 yet. Now, I’d love to hear from you. Are you planning to get Ableton Live 12? Is it worth it, in your opinion? Let me know in the comments The post Ableton Live 12: Yes or No? appeared first on EDM Tips. View the full article
  8. Learn how to make MELODIC TECHNO in the style of artists such as Miss Monique, Artbat and Anyma. This step-by-step music production guide shows you how to produce one of the most popular current genres in electronic dance music. You can also download this project file to open in Ableton Live, so you can follow along and really understand the techniques being shared. » Download this project file for free here: https://bit.ly/49hdzTl Melodic techno, a genre that combines the pulsating energy of techno with emotive melodies and harmonies, has captivated audiences worldwide. Producing music in this genre requires a blend of technical skill, creativity, and an understanding of the delicate balance between rhythm and melody. In this guide, we’ll explore key aspects of producing melodic techno, from selecting your tools to arranging your tracks for emotional impact. How to produce Melodic Techno 1. Start with the Right Tools The foundation of any good production is choosing the right software and hardware. For melodic techno, a Digital Audio Workstation (DAW) that allows for intricate sound design and sequencing is crucial. Popular choices include Ableton Live, Logic Pro, and FL Studio. Synthesizers, both hardware and software, are essential for crafting those signature sounds—think deep basses, atmospheric pads, and arpeggiated leads. Native Instruments’ Massive, Serum by Xfer Records, and Moog synthesizers are excellent starting points. 2. Crafting the Beat The beat is the backbone of any techno track. Begin with a solid kick drum that punches through the mix. Layering a sub-bass beneath the kick can add depth. Hi-hats, claps, and snares should complement the kick, creating a driving rhythm without overwhelming the mix. Experiment with percussion elements and rhythmic patterns to find a groove that feels both compelling and unique. 3. Melody and Harmony What sets melodic techno apart are its emotive melodies and lush harmonies. Start with a simple melody that resonates with you emotionally. This melody can be a loop that evolves over time or a more complex sequence that serves as the track’s focal point. Use scale modes like Aeolian or Dorian to evoke specific moods. Harmonies, created with chord pads or layered leads, should support the melody and add depth to your track. Remember, less is often more; a few well-chosen notes can be more powerful than a complex chord progression. 4. Sound Design and Textures Sound design is where you can truly personalize your track. Use filters, modulation, and effects like reverb and delay to create atmospheric textures that give your track a sense of space. Automation can bring movement to your sounds, making static pads come alive or adding tension and release to your arrangements. 5. Structure and Arrangement Arranging your track in a way that takes the listener on a journey is crucial. Most melodic techno tracks follow a structure that builds up to a climax before winding down. Introduce elements gradually, and consider breaks and drops to maintain interest. Tension and release are your tools; use them to create moments of anticipation followed by emotional payoff. 6. Mixing and Mastering A clean mix is essential. Balance your levels so that no element overwhelms the others. EQ is your friend—use it to carve out space for each component in the mix. Compression can tighten your drums and add punch to your bass. When you’re satisfied with the mix, mastering can give your track the final polish it needs to stand out. It’s often best to have an experienced ear handle the mastering, but there are also mastering plugins and online services that can do a commendable job. Conclusion Producing melodic techno is an art that requires patience, experimentation, and an ear for detail. By focusing on the key elements outlined above, you can start to develop your unique sound within this evocative genre. Remember, the goal is to evoke emotion and create a visceral experience for the listener. With time and practice, you’ll find your groove and contribute your voice to the world of melodic techno. If you want to become professional producer, check out the Music Production Accelerator, where our students have achieved over 100,000,000 Spotify Streams, been signed to world’s biggest labels, and toured as DJs and producers. The post How to Make Melodic Techno (like Miss Monique, Artbat & Anyma) appeared first on EDM Tips. View the full article
  9. If your music lacks dynamics, movement, life and generally excitement or if you get stuck in an eight-bar loop and don’t know how to finish your track, this is for you! Ableton automation (or automation in any DAW), is one tool that every single professional music producer knows how to get the most from. Make sure to read to the end because the real power comes when you apply all of these techniques together. Record The Automation First off, if you prefer a more hands-on approach and you’ve got a MIDI controller then you don’t need to program in automation via your mouse. Instead, you can actually assign any of the controls within your DAW to one of the MIDI controls on your controller. Now, just modulate these parameters manually and record them as you go. Aside from this being quite a lot of fun, it also sometimes renders a more natural feeling and introduces a bit more spontaneity. This is the Ableton way to record this in: 1. Make sure that the MIDI track is armed. 2. Be sure to hit the overdub button because if you don’t, and you start recording, you’re going to record over those MIDI notes as well – and you don’t want that. 3. Hit record, press play and move some knobs and faders! 4. When you’re done just stop the recording and hit “A” to show the automation. Obviously, from this point, you can still tweak it. But that’s it, that’s the basics of automation right there! Next up, we’ll dive into the most common parameters that you want to automate. Volume Automation http://edmtips.com/wp-content/uploads/2023/03/Volume-Automation-in-Utility-Ableton-221x300.png Automating the volume might be one of the most essential parameters to automate. But let me point the following out right away, be sure NOT to automate the volume on the mixer channel! Because if you later want to mix that channel’s loudness, you’d have to tweak all automation points individually. So, instead, throw in a dedicated gain plugin which in Ableton would be called “Utility”. All you need to do now is to right click the gain knob and choose “Show automation in new lane” and you’re ready to automate! EQ / Filter Frequency Automation Very powerful for transitioning into the drop is to apply a high pass filter on particular sounds or your entire mix even and gradually automate the cutoff frequency during the build-up. This way you can slowly filter out more and more frequencies only to bring them fully back right when your drop starts. Same can be done for the high-end too! It’s the same idea but this time we’re starting with the highs. Note, you can very well combine these two methods for even more impact once you bring the full frequency spectrum back. Furthermore, take advantage of the Q-Value. It can be automated too and can lead to a more interesting sound. But don’t go too far – it might become very resonant fast! http://edmtips.com/wp-content/uploads/2023/03/Filter-Frequency-Automation-Ableton-1024x411.png Ableton Pitch Automation The next most powerful and widely used parameter that you can automate is pitch. This can really help you with your arrangement. Let’s say, you want to create a riser. Start with playing a sustained note (the root note of the track is a good starting point) and then draw in a pitch automation starting from -12 semitones going all the way up to +12 semitones. This will cover two full octaves and make a nice, tonal riser. Wonderful also on build up drums like your snare that goes faster and faster. Just pitch up your snare using Ableton’s Sampler as the snare speeds up approaching the drop. Group Automation The next fantastic Ableton automation trick is to apply it across an entire group. Chances are, if you want to filter out certain frequencies on, let’s say, the bass, you want that to happen on all your bass layers and not just on one. So, instead of creating one individual frequency cutoff automation per layer, apply one on the entire group to make all the elements in that group work towards the same goal. Ableton Send Automation For the next trick, we’re running our drums through a send channel with reverb. For that, we create a new auxiliary channel with an instance of a reverb plugin and send our drums (or whatever element you want to apply this technique on) through it. The magic happens when we automate the send control only. This way, we retain the dry drum signal but can also gradually blend in the drum wash (i.e., the fully wet reverb drum signal) into the mix. Incidental Send Delays The send automation we just explored is exactly what you need again for the next trick – incidental send delays. This is powerful on vocals because it allows you to exactly choose which syllables or fragments get sent through the delay channel. To do that, create an auxiliary channel, put a delay unit on it and set it to a hundred percent wet. Open up the send control now via automation but only exactly when the part of the vocal gets sung that you want to have delayed and then close it right back down again. In order to keep the delay amount under control simply automate the delay feedback as well and bring it back to zero to stop the delay effect. This is wonderful for vocals but does work nicely on leads too for example! Advanced Automation http://edmtips.com/wp-content/uploads/2023/03/Advanced-Automation-in-Ableton-Echo.jpg Another really interesting effect is automating the time delay between the left and the right signal on Ableton’s Echo plugin. This will lead to ever changing movement in the stereo field for as long as you keep automating. It may have kind of a Haas effect when the difference between the left and right signal is relatively short but may evolve into a very wide bouncy ping pong nature if the time delay is opened up enough. In any case, it introduces interest into your lead, arp or synth sound. This can be further combined with automating the delay feedback and if you now add a sidechain compressor on top for some extra bounce, you’re golden! Ableton Clip Automation (“Automate Automation”) http://edmtips.com/wp-content/uploads/2023/03/Clip-Automation-Ableton.png “Automate the automation” might sound confusing at first but essentially what we’re doing in our next trick is creating an automation pattern we want to repeat in nature but evolve over time. For instance, let’s create a filter that opens up and closes down over eight bars. But each time the cycle repeats we want the filter to open up a bit more than it did last time. To bring this into effect, we establish first a filter automation as we’ve learned it before. The difference, however, is that we nest that automation within the MIDI clip itself. As we automate the nested clip automation in arrangement view, we can gradually open up our previously created filter automation which is super powerful for synth acid lines. Macro Automation http://edmtips.com/wp-content/uploads/2023/03/Macro-Automation-Ableton-300x244.pngFinally, let’s discuss macro automation to make the whole process much easier. Macro automation basically means linking multiple parameters to one knob which you then automate in the project. For instance, if you have an effect rack consisting of many plugins grouped together, try to map multiple parameters to one macro knob. It takes a bit of experience and/or experimentation to know what works – but figuring that out is part of the fun! Just click on the map button and assign the parameters. Now it’s your turn to get creative and link filter, reverb, delay, volume and even parameters from inside the synth together and create amazing transitions to perfectly move from one section of the song to the next one – just like a pro! We hope you found these Ableton automation tricks interesting. Which one is your favourite? Which one will you try out in your next track? Write us a comment below and let us know! Happy producing! The post Amazing Ableton Automation Tricks PRO Producers ACTUALLY Use appeared first on EDM Tips. View the full article
  10. Learn how to make Melodic House (in the style of Eli & Fur) in this Ableton Live House Music tutorial. If you’ve ever wondered how to make deep melodic house music in the style of Eli & Fur, this step-by-step tutorial will give you an insight into how to achieve similar results. This isn’t only a tutorial on how to make Melodic House in Ableton Live, though…you can use the same methods in FL Studio or Logic Pro, to produce your own house music in the style of Eli & Fur. Let’s do this!… ►► Download this project with all the samples by clicking here. ►► CLICK HERE to share this on Twitter: https://ctt.ac/7C9_4 In this tutorial we go in-depth into: 01:12 – Sourcing Vocals 02:45 – Piano Chord Progression 05:34 – Vocal Timing 06:50 – Vocal Processing 10:10 – Piano Processing 10:50 – Kick Drum 15:20 – Bass 18:22 – Drum Programming 26:25 – Evolving Sound-Bed 28:13 – Adding Groove to the Chords 29:56 – Evolving Sound-Bed (Continued) 31:44 – Vocal Pad 34:00 – Polymeters and Polyrhythms 35:28 – Constant Evolution 41:15 – Synth Riff 43:26 – Chord stabs 45:08 – Vocal Delay & Arrangement Eli & Fur are a DJ and electronic music producer duo comprising Eliza Noble and Jennifer Skillman, hailing from London. Eli & Fur have been working together since they were in their teens. The group has a background in songwriting and while they started out in DJ music, they are moving into live acts using Ableton software. Instead of mixing other tracks, Eli & Fur write and play their own tracks, which creates a sound that is “distinctly electronic, mixing house and dance beats.” Melodic House has seen a huge surge in popularity over the past few years, thanks to artists such as Ben Böhmer, Lane 8 and Eli & Fur. The record label that is most associated with the genre is Anjunadeep. Hope you enjoy, and if you have any technical questions, just drop them below and I’ll see if I can help The post How to Make MELODIC HOUSE (Like Eli & Fur) – FREE Ableton Project & Samples! appeared first on EDM Tips. View the full article
  11. Hold onto your hi-hats, producer friends: Ableton has announced the release of their latest flagship software, Ableton Live 11, slated for release in early 2020. And from what we’ve seen thus far, it’s a massive update that adds some long-awaited features, as well as offers more tools for creative expression. Let’s take a look at […] The post Ableton Live 11 is coming, and with it major updates appeared first on DJ TechTools. View the full article
  • Member Statistics

    14,302
    Total Members
    522
    Most Online
    W.A. Production
    Newest Member
    W.A. Production
    Joined
×
×
  • Create New...